FAQ & How To Guides
Step-by-step instructions to help you get the most out of The Sports Dashboard
How to Create a Team
From your dashboard, look for the "Your Teams" section or go to "Manage Teams". You'll see buttons to create or add a new team.
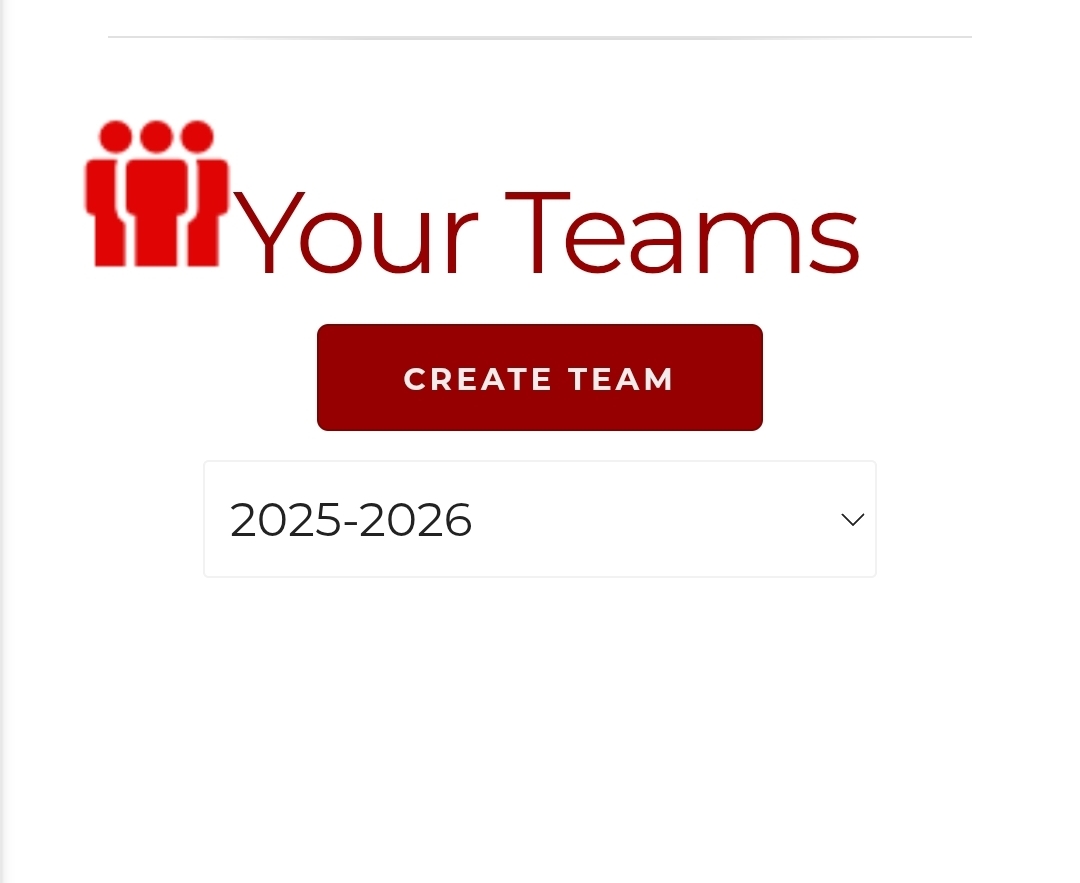
Option 1: Click "CREATE TEAM" from Your Teams
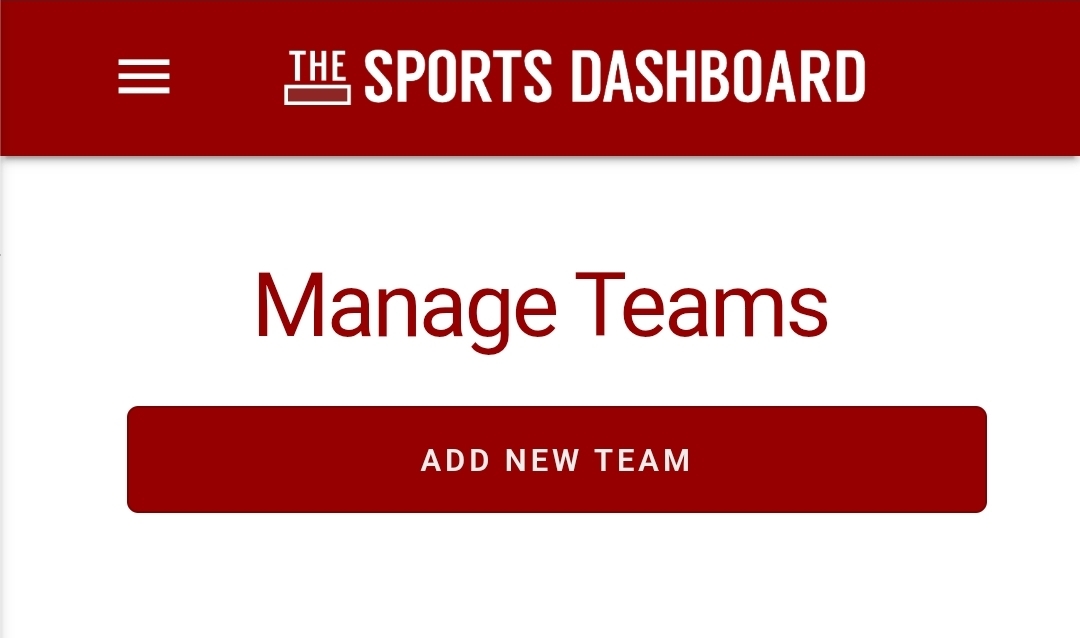
Option 2: Click "ADD NEW TEAM" from Manage Teams
After clicking the button, a form will appear. Enter your team's information including:
- Team Name
- Season/Year (e.g., 2025-2026)
- Any additional team details
Scroll to the bottom of the form and click the "Submit" button to create your team. Your new team will then appear in your teams list.
Create Your Roster
Now that you've created your team, click on your team to navigate to the team home. From here you'll see options to manage your roster, game data, and schedule.
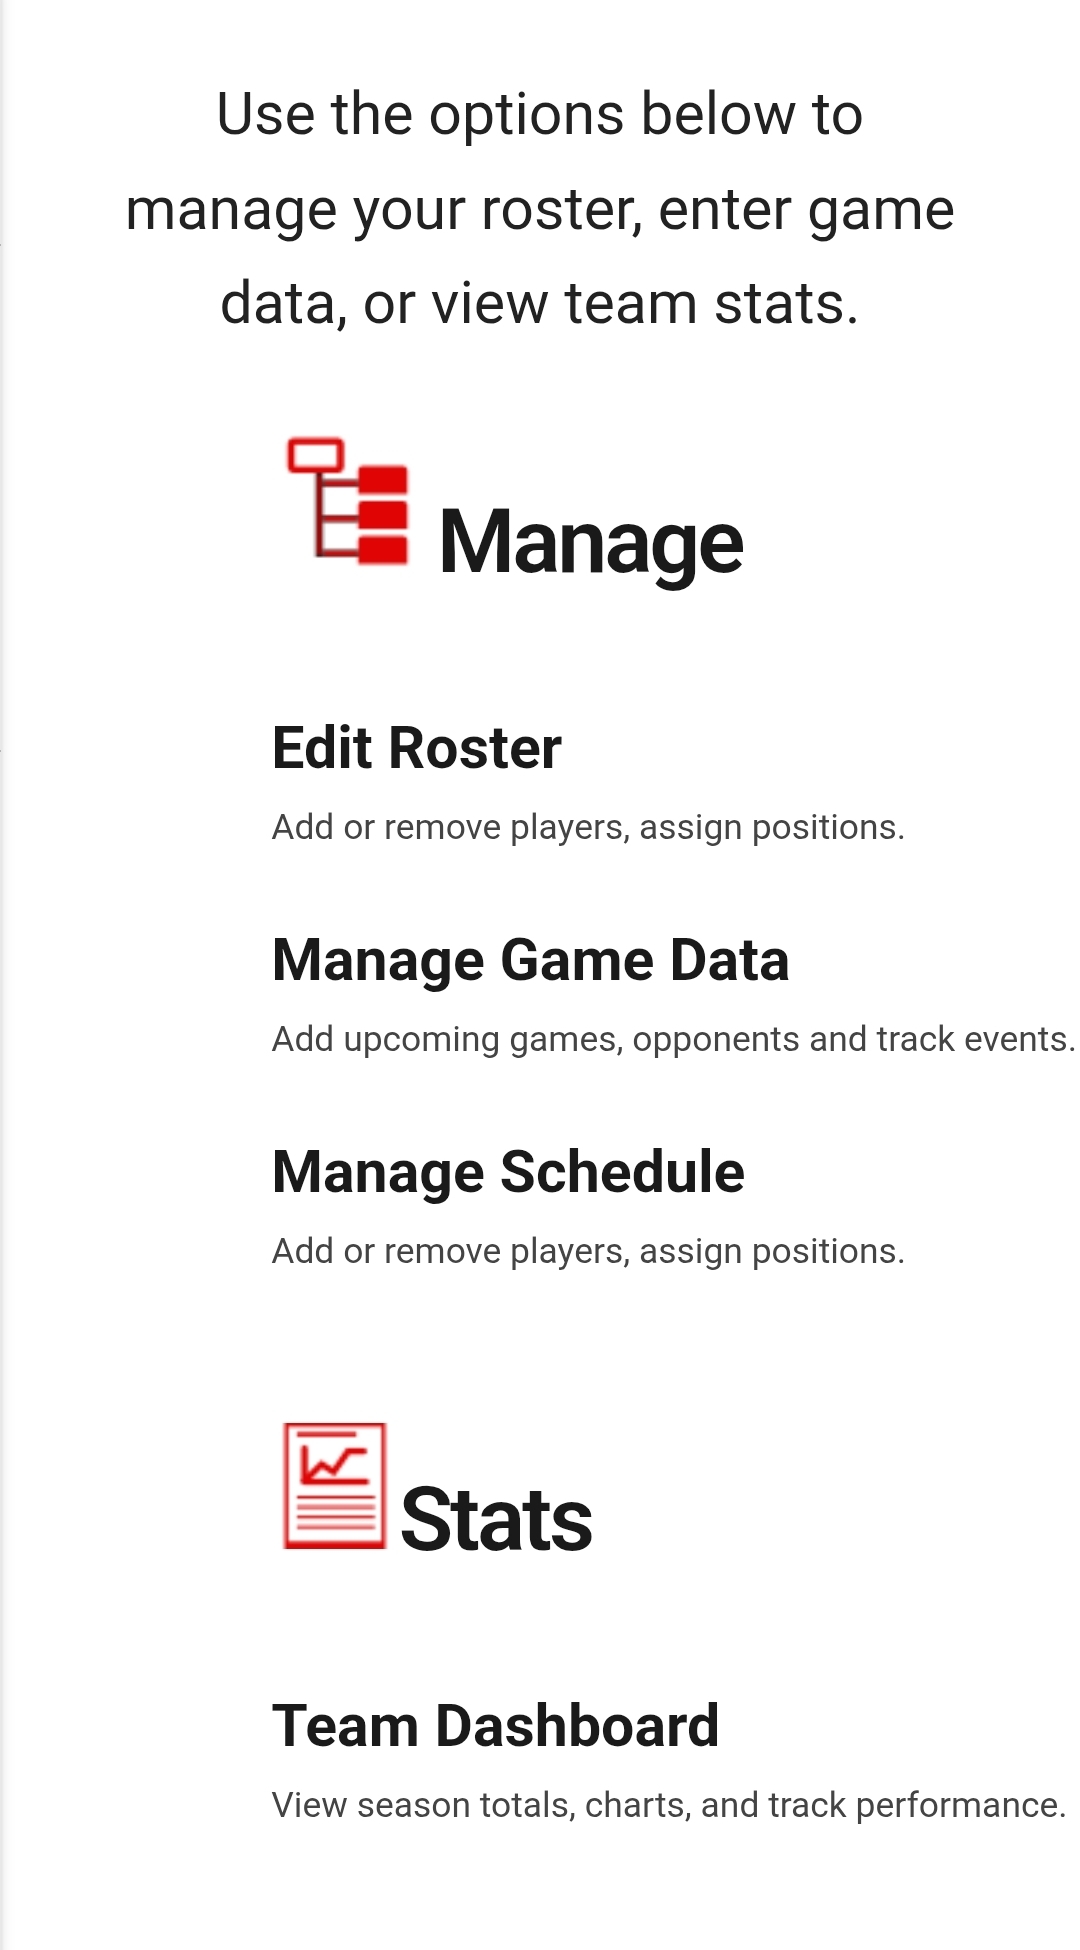
Team Home with Manage options including Edit Roster
Under the "Manage" section, click on "Edit Roster" to add or remove players and assign positions. If you haven't added any players yet, you'll see "No Roster Found."
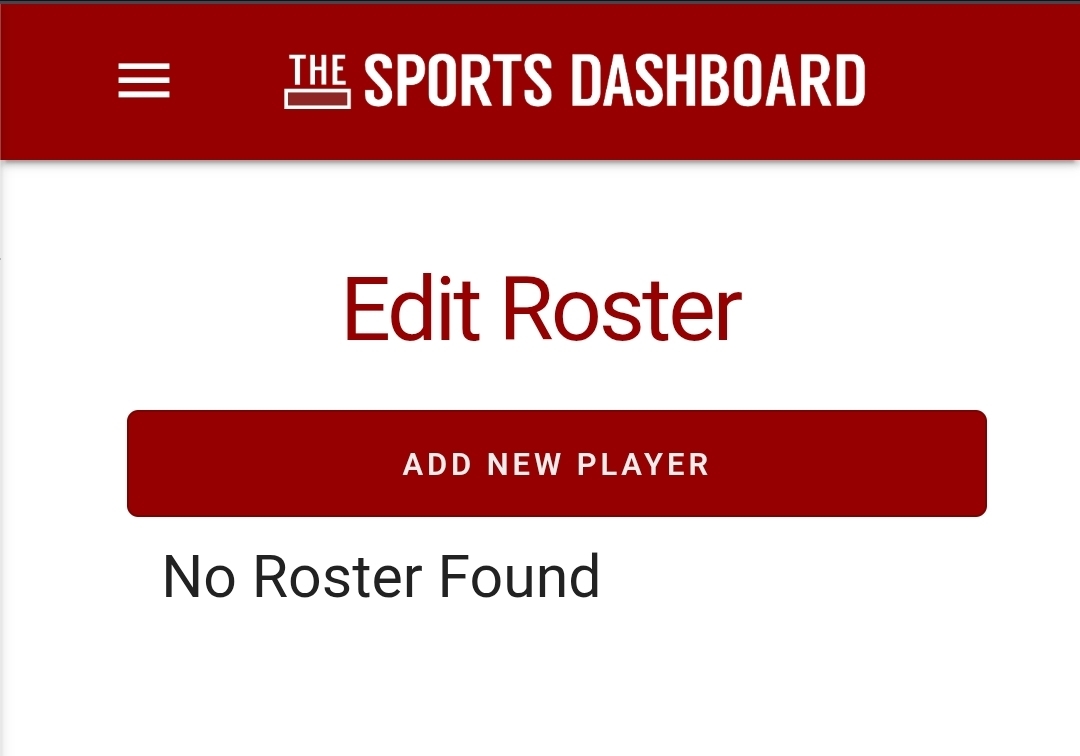
Click "ADD NEW PLAYER" to start building your roster
Click "ADD NEW PLAYER" to open the player form. Fill out the required information:
- First Name (use initials only to protect minors)
- Last Name
- Position (F, D, G, etc.)
- Jersey Number
- Email (optional)
- Season Year
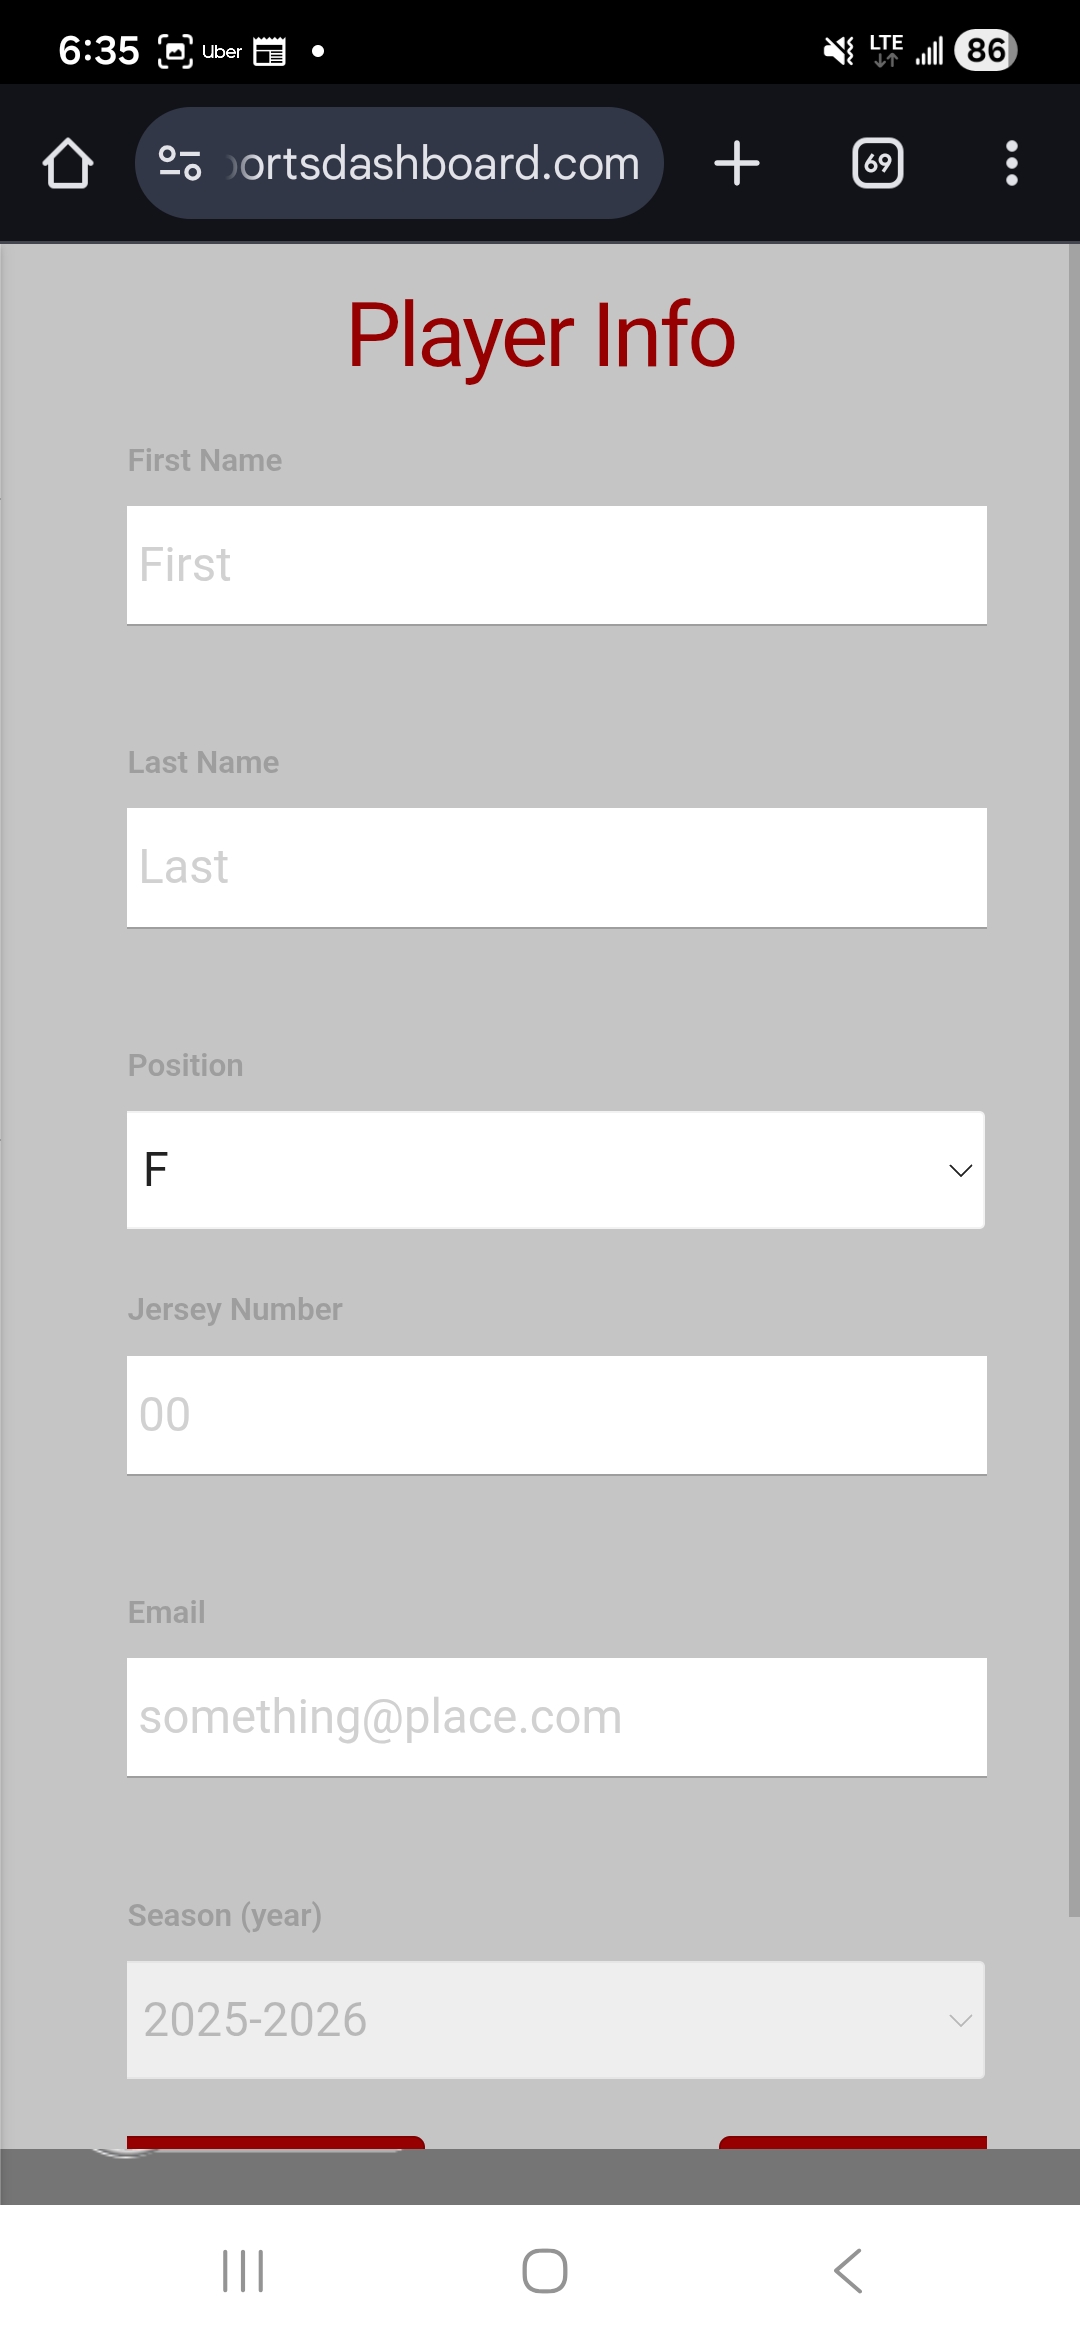
Player Info form - fill in the details for each player
Repeat the process to add each player on your team. Continue until your entire roster is added.
Schedule a Game
Make sure you're on the team home page. Use the hamburger navigation menu in the top left corner to return to team home if needed.
Team Home with navigation options including Manage Schedule
Under the "Manage" section, click on "Manage Schedule" to view and add games to your schedule. If you haven't added any games yet, you'll see "No Schedule Found."
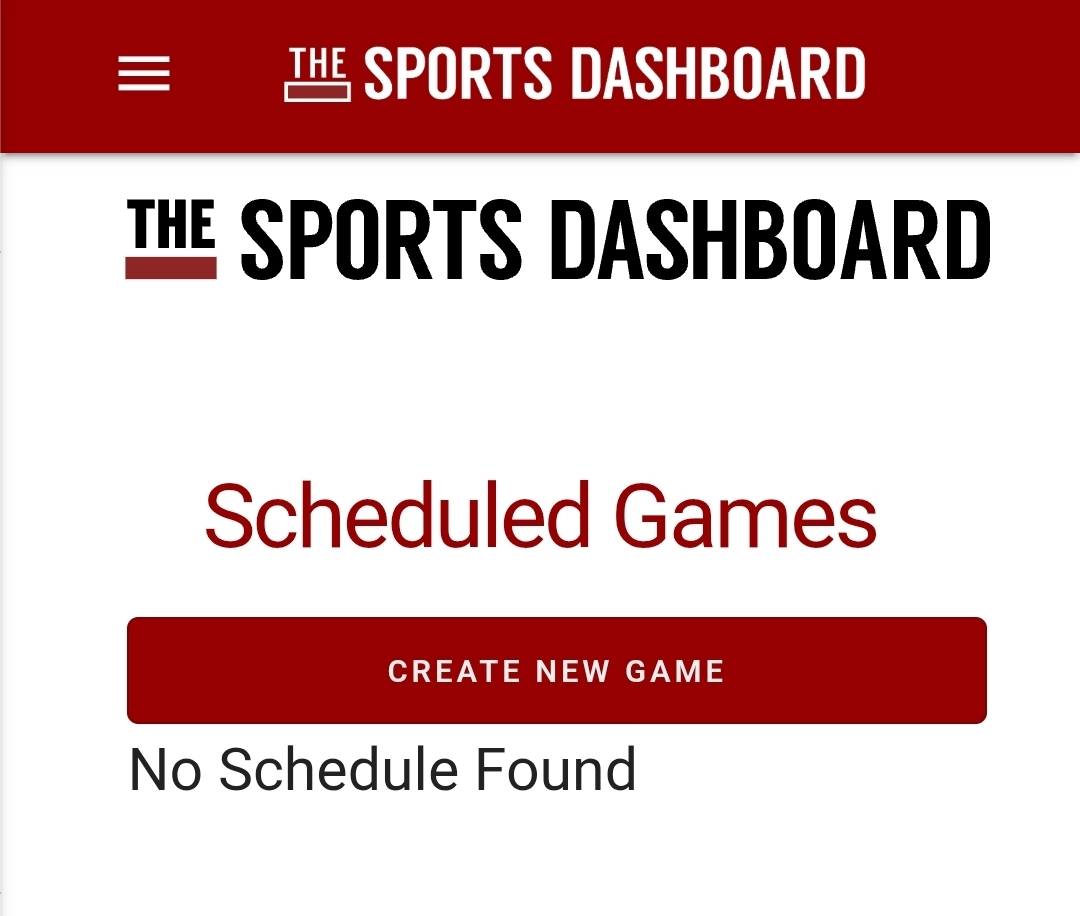
Click "CREATE NEW GAME" to add a game to your schedule
Click "CREATE NEW GAME" to open the game form. Fill out the game information:
- Home Team
- Away Team
- Event Type (Regular Season, Playoff, etc.)
- Date and Time
- Home Facility (location)
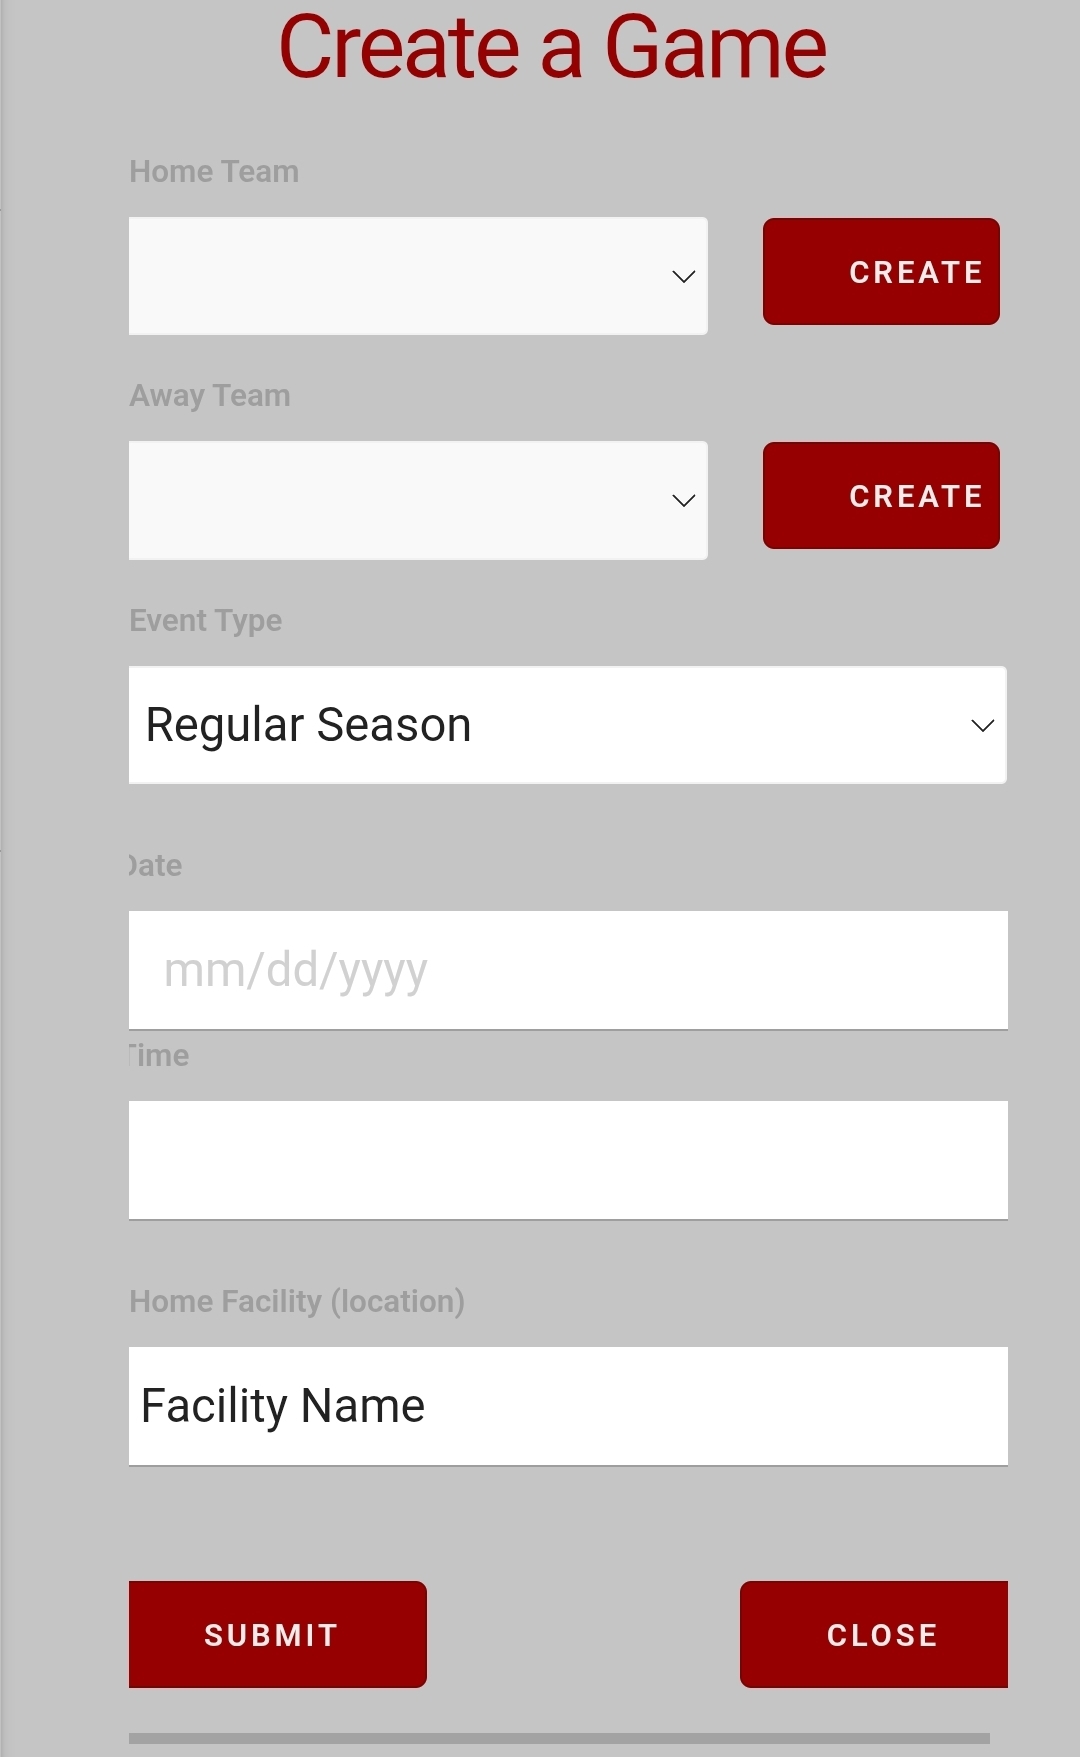
Fill in your game details and click Submit
How to Enter Events
Once you've navigated to your game (clicking the game text on the ManageGameData page), you can now start entering game events. The ice rink interface will be displayed with the team names and score at the top.
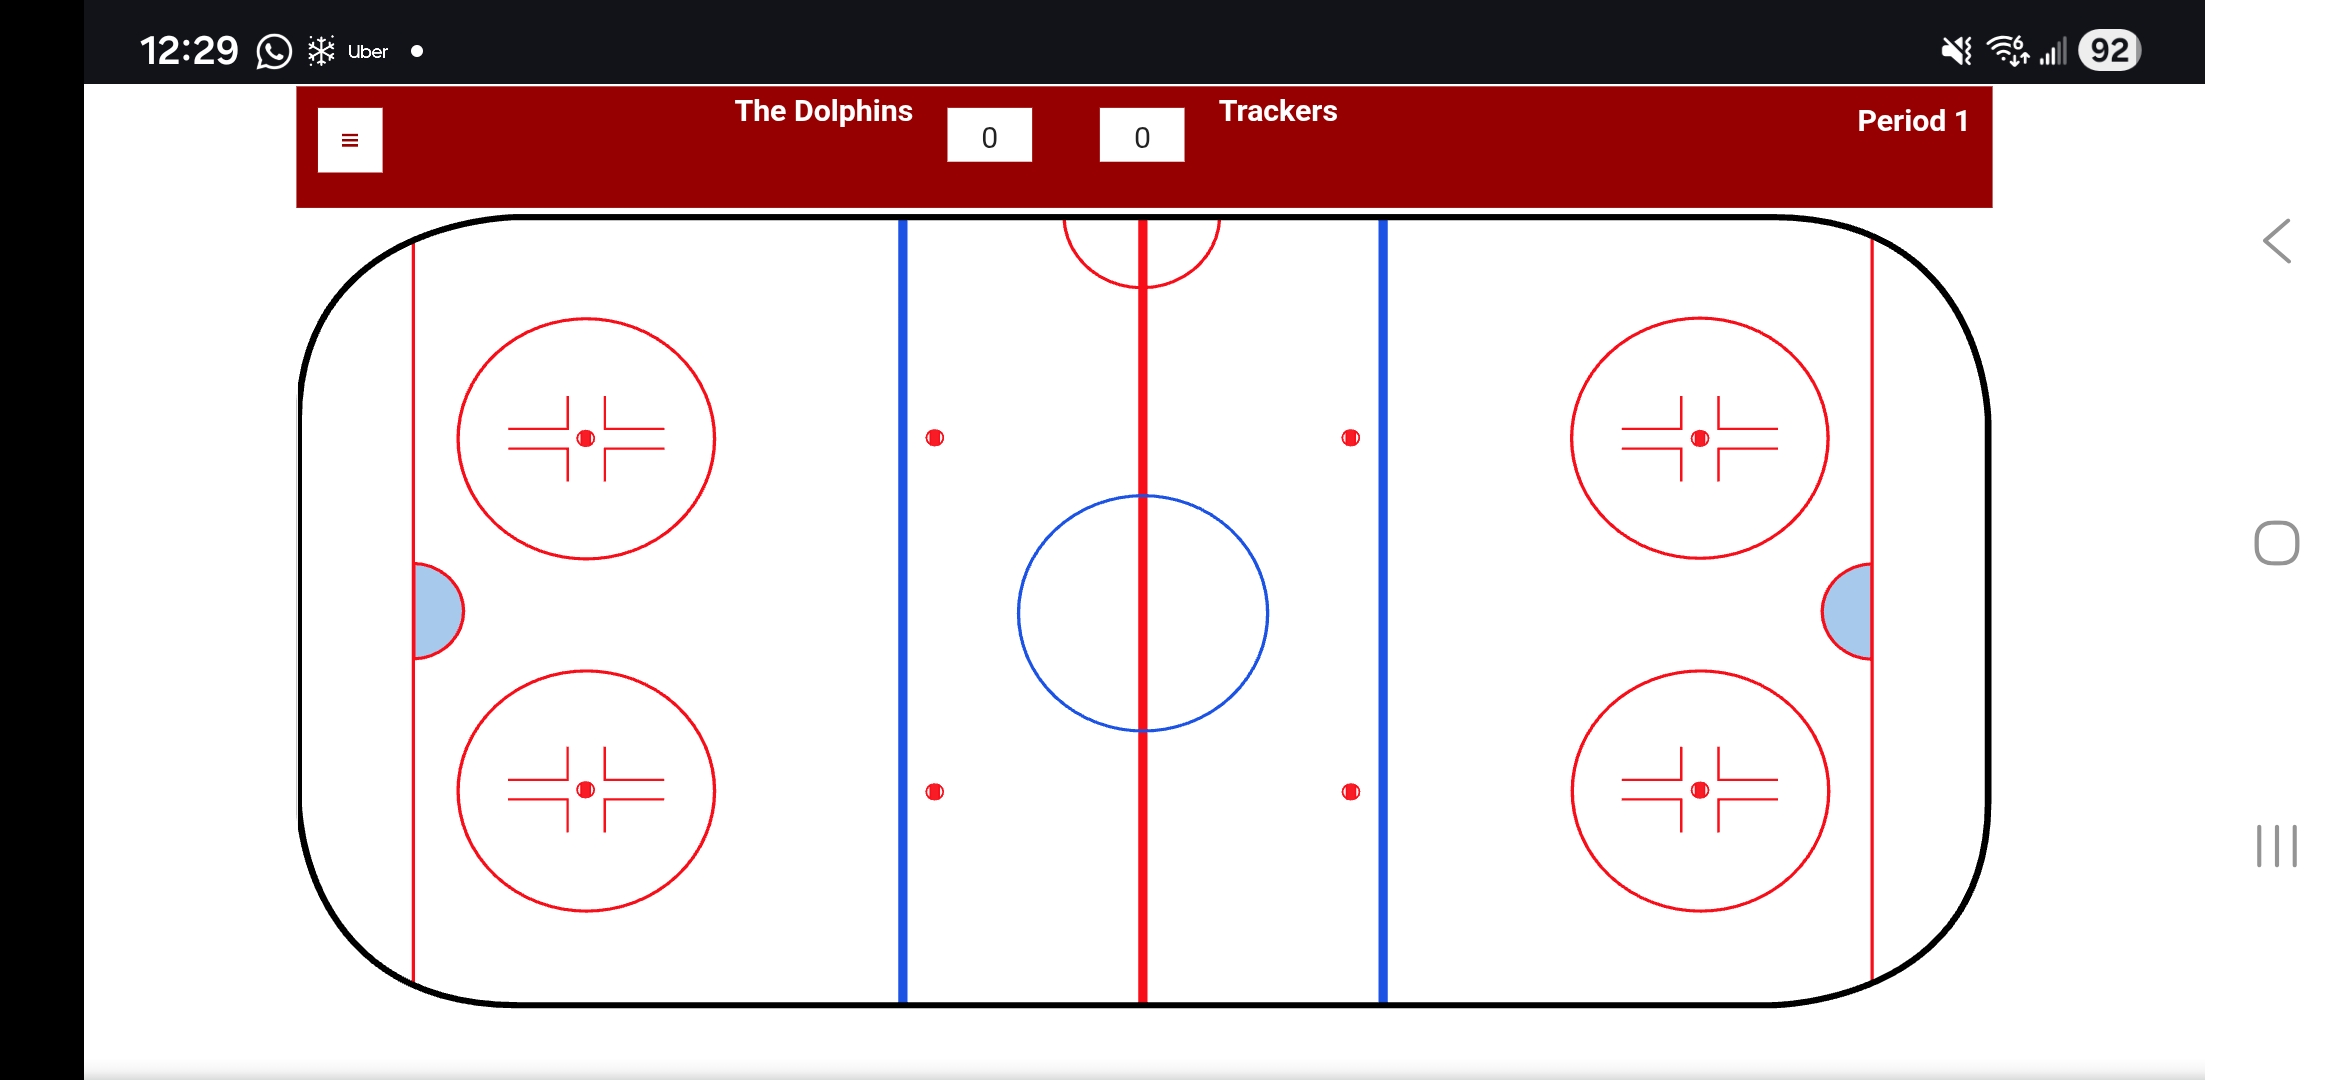
The game tracking interface with the ice rink
To enter an event, click on the rink location where the event occurred. A modal will appear asking you to select the event type.
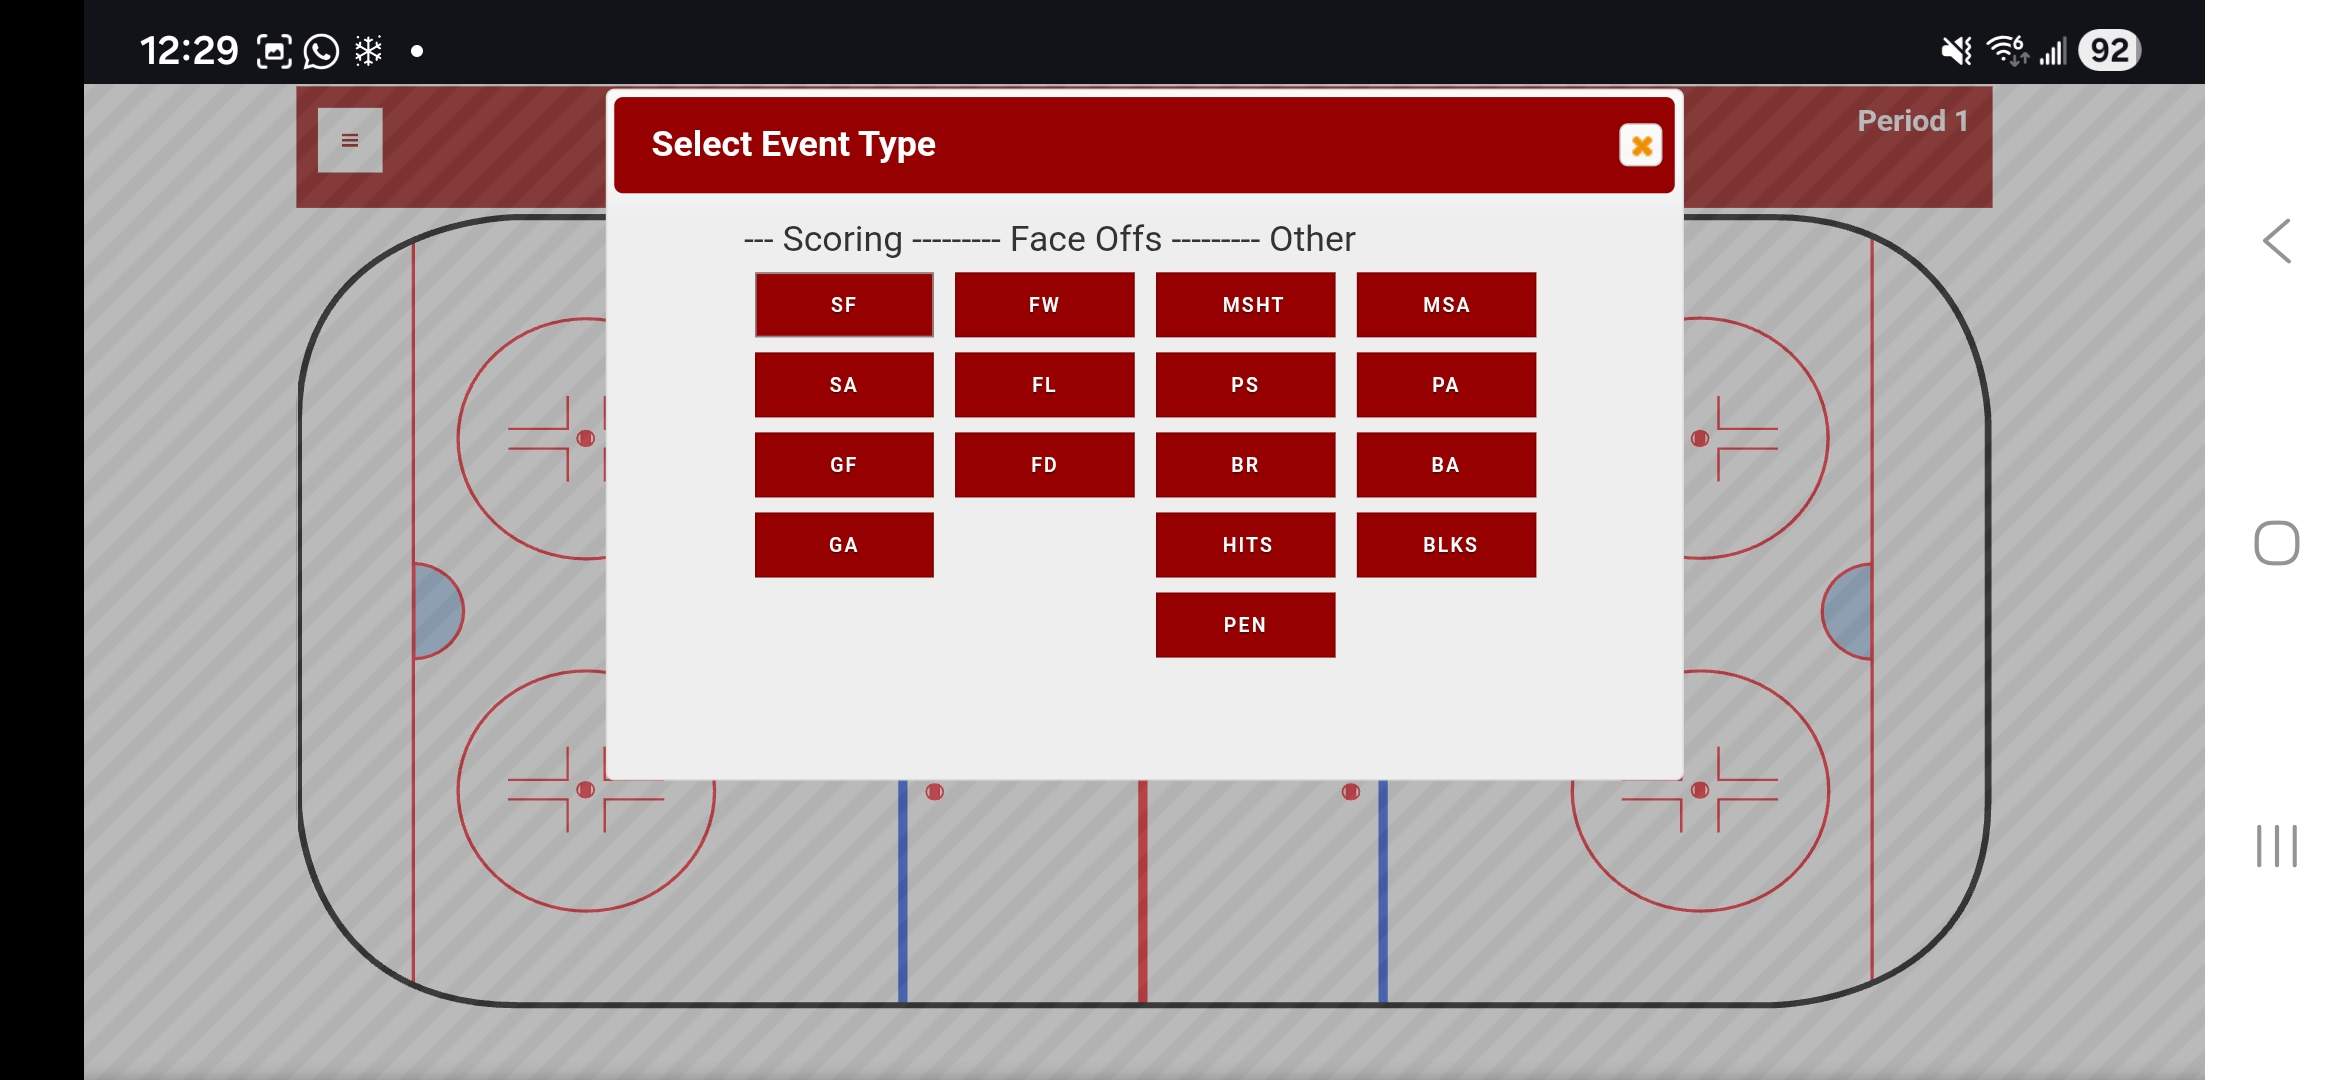
Select the event type (Scoring, Face Offs, or Other)
After selecting the event type, choose the player involved. For goals, you'll be asked for player assists. For Goals Against (GA) and Shots Against (SA) there will not be a player selection.
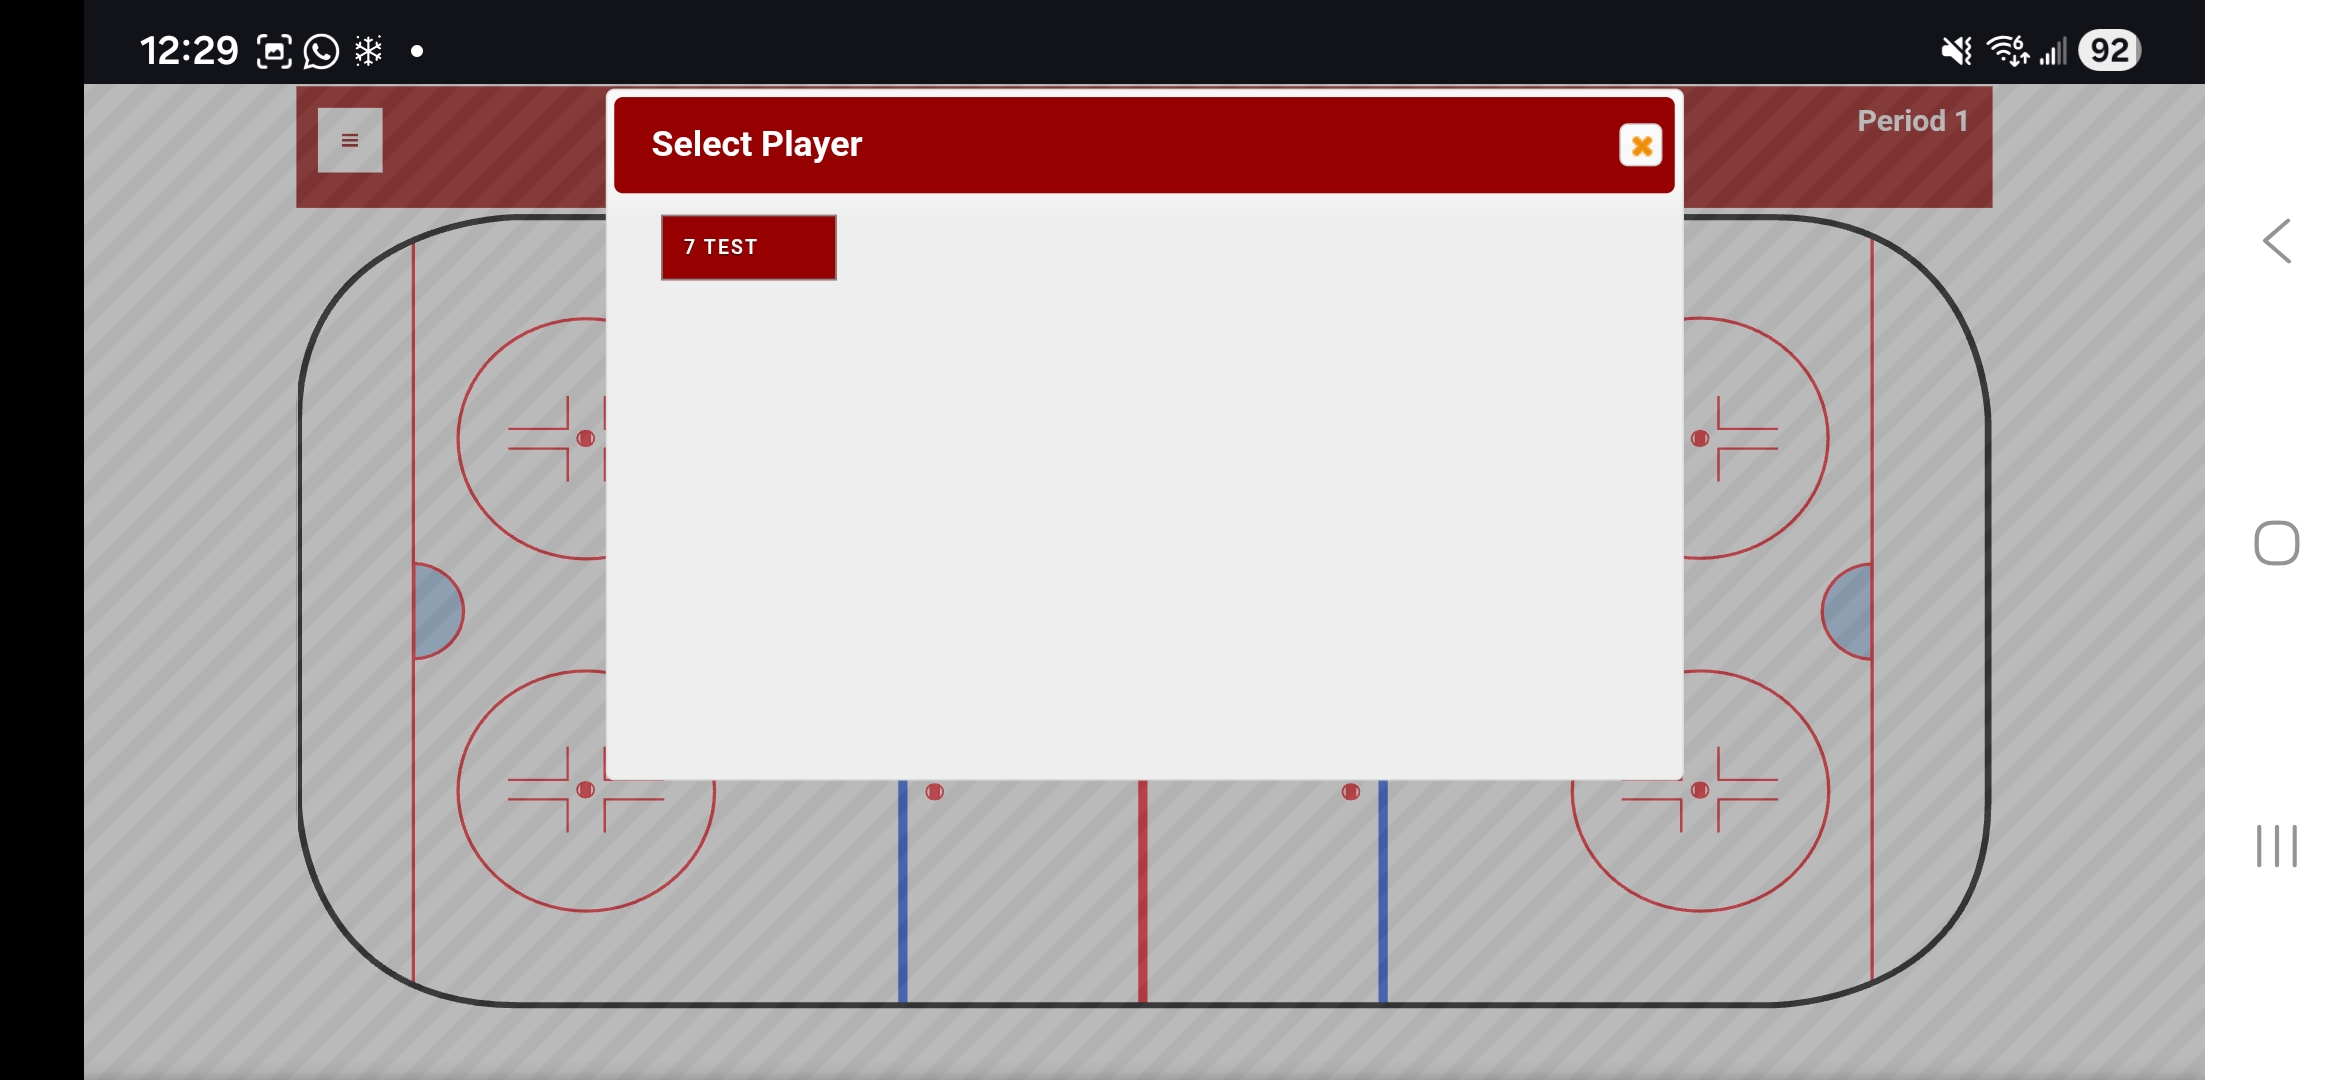
Select the player for this event
After entering events, they will appear as markers on the ice rink showing where each event occurred during the game.
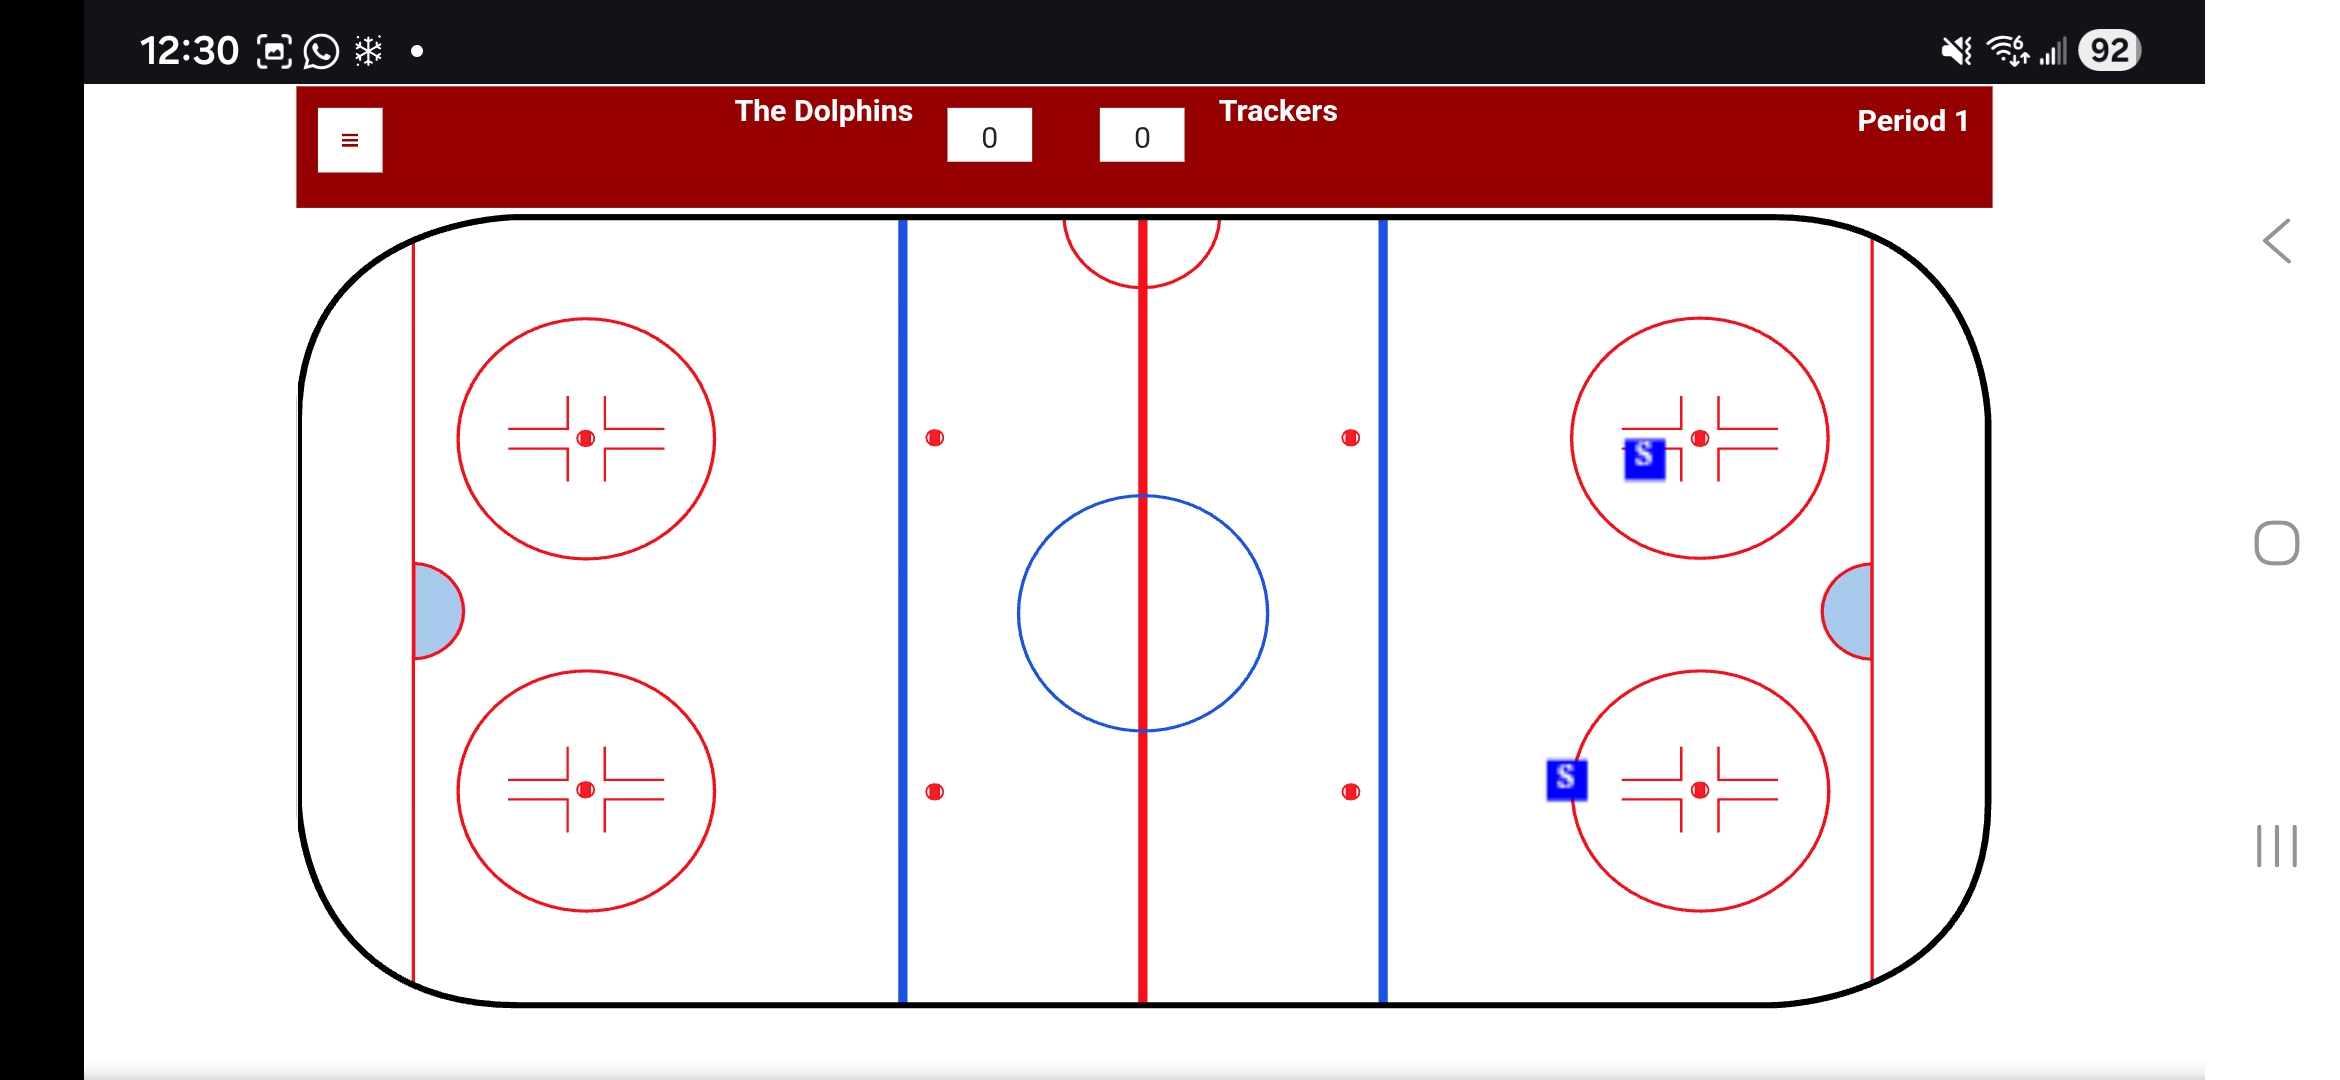
Events displayed as markers on the rink
Select the main menu (3 bar hamburger) in the top left corner to navigate back to the team home page, change periods, select the goalie, review stats, and save the data to the server.
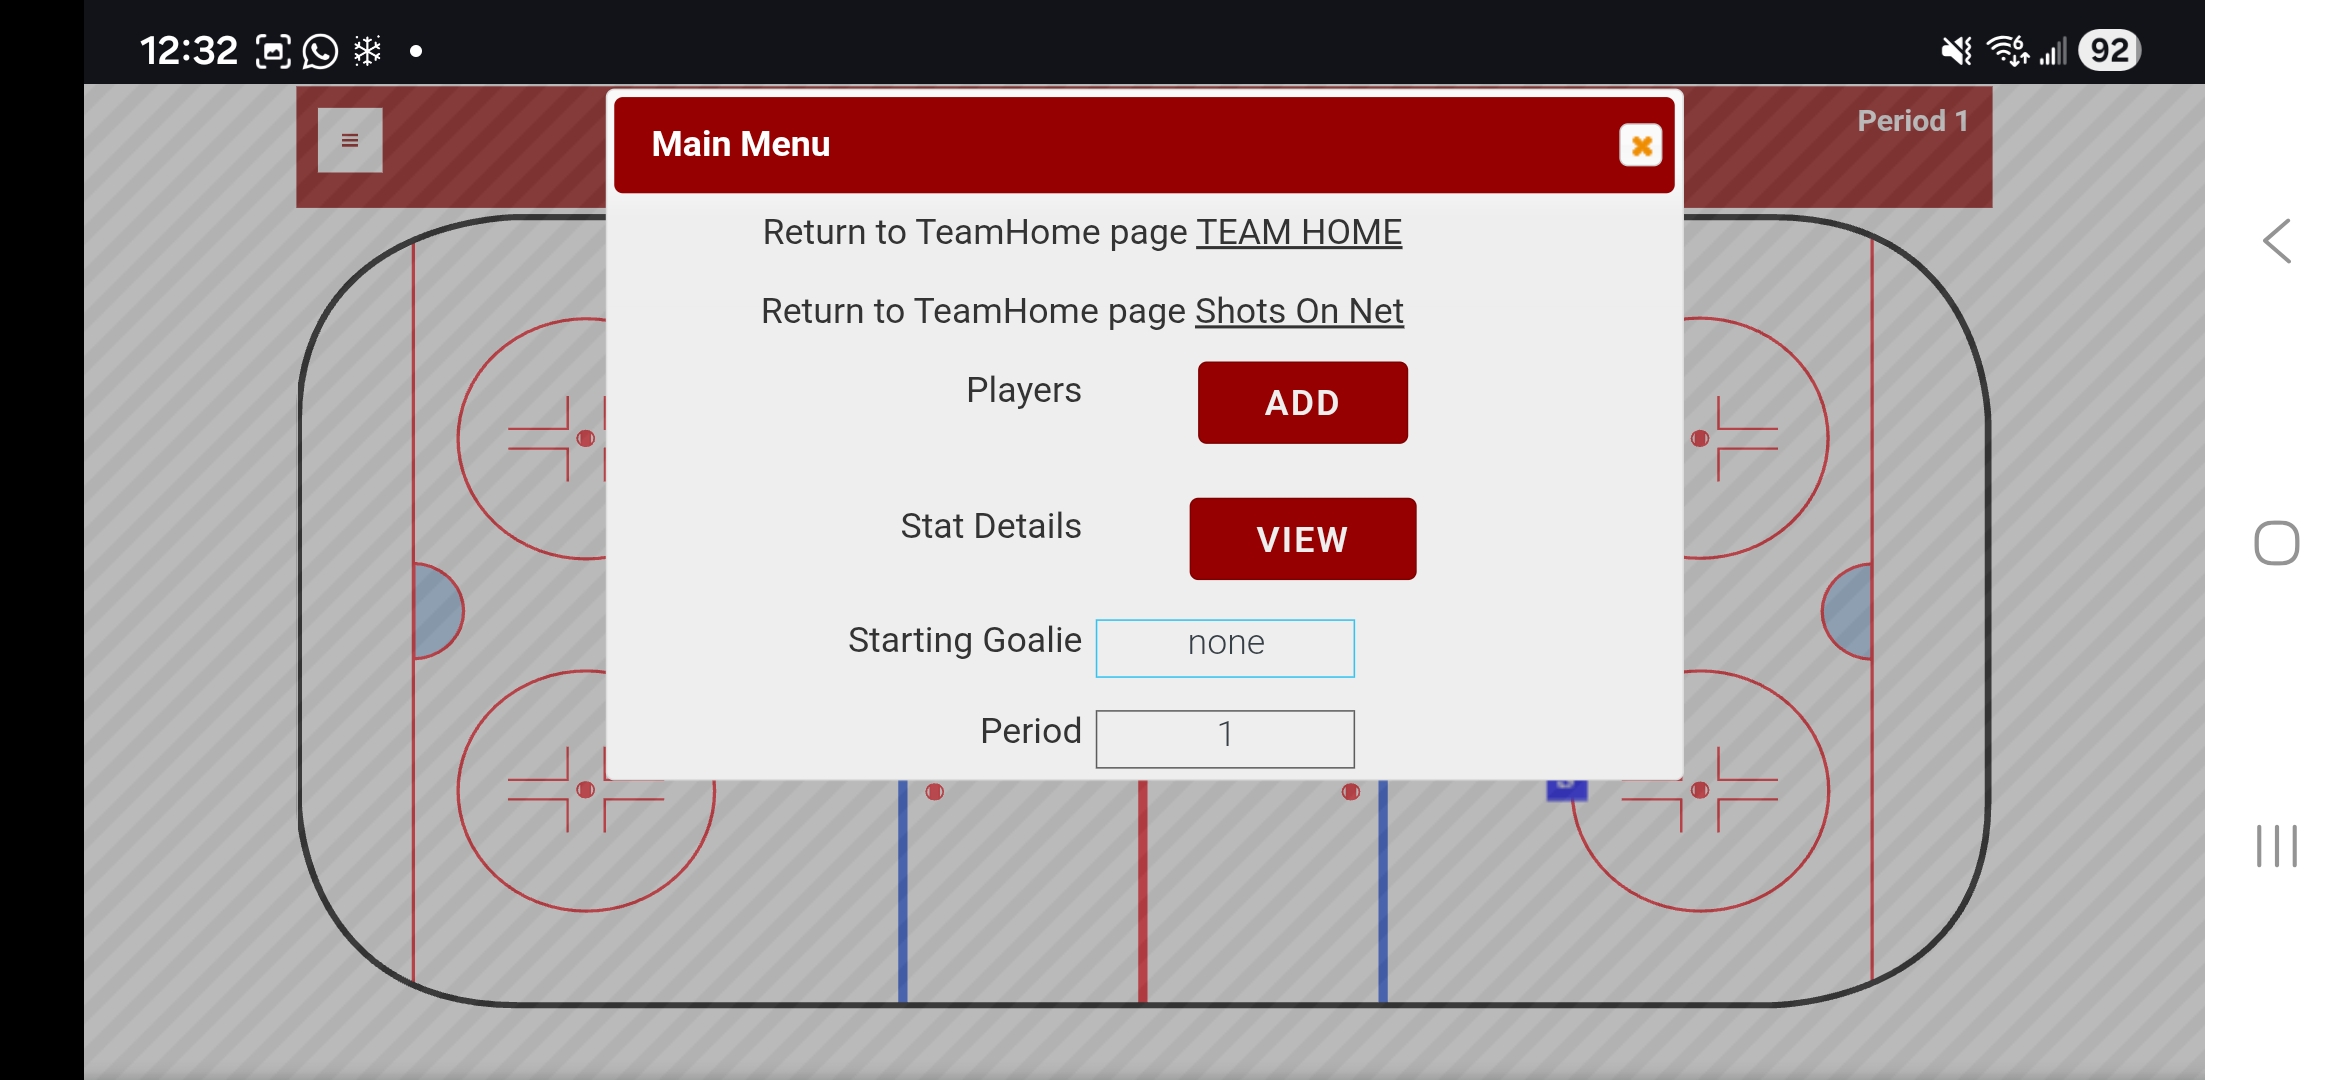
Main Menu with navigation and save options
View Game Sheet
Once the game events have been saved to the server, navigate back to the Manage Game Data page. You'll see your games listed under "In Process" or "Completed" sections.

The Manage Game Data page showing your games
Click the "GS" button next to the game to open the Game Sheet. The Game Sheet has 4 sections: game summary, player stats, event locations, and shot locations.
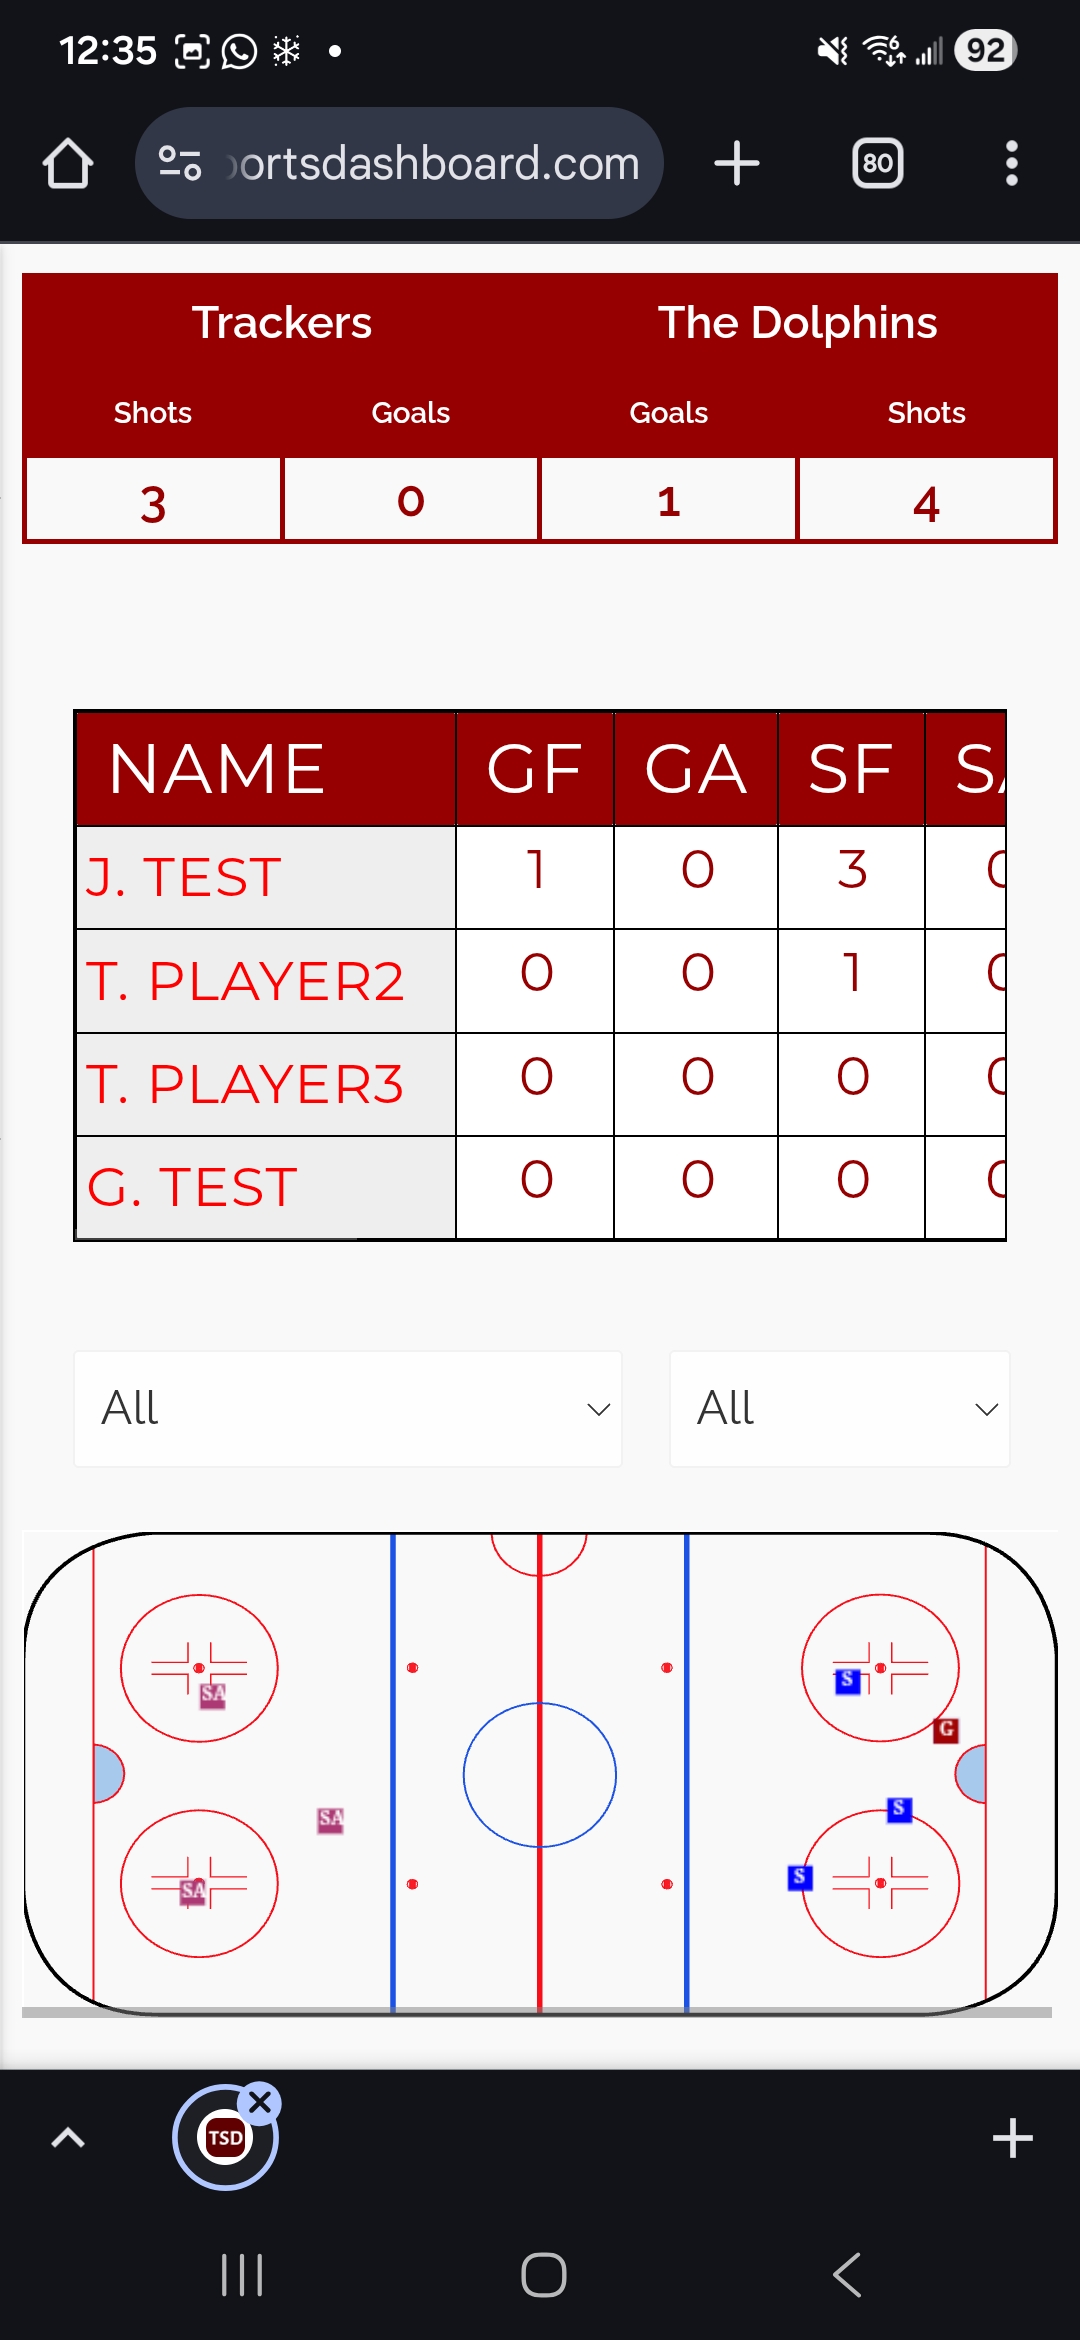
Game Sheet showing summary, player stats, and event locations
The shot locations section shows where shots on net were taken, displayed on the goal view. This helps analyze shooting patterns and tendencies.
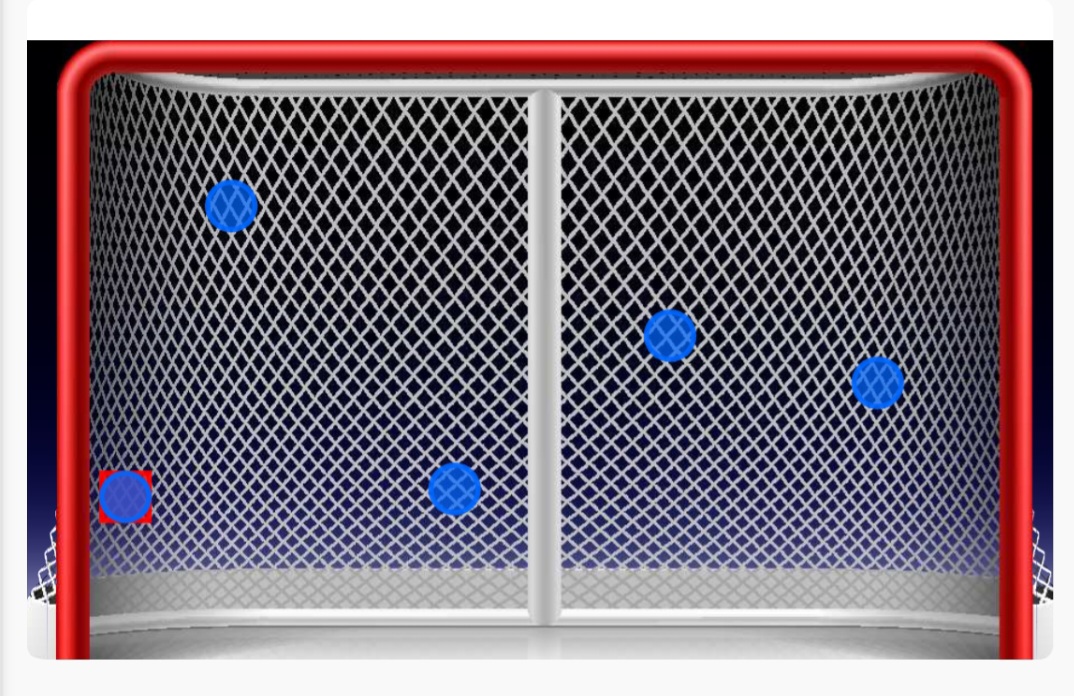
Shot locations displayed on the net